Richard and I arrived at Daisy Haven Farm in southeast Pennsylvania, with a car full of boots, tools and old glue, plus two brains chock to the brim with questions.
We were attending the final workshop day of four, so got introduced quickly to the other trimmers and farriers and we set to work. We joined our friend Rachel there as well; she’d attended part of the day prior so was already acquainted with the gang.
Daisy is an enthusiastic and crystal-clear instructor. She managed our time but took time to answer questions, kept us in line but let discussions go in areas it needed to go. As someone who teaches for a living, I always admire good teachers, and Daisy is top-notch. She got into the profession rather by accident after her dressage horse foundered and she needed to find a solution to keep him comfortable not only for schooling, but also for the transition into the dressage arena. Warming up in boots, stripping them off and then hitting the arena after “losing her forward” was just not working for her.
The more she learned, the more intrigued she became, and here we are!
We started right off gluing an Epona shoe on to a cadaver foot.
Right off the bat, Daisy made it clear that the key to success is absolutely FOOT PREP!
She has a table she uses and sets up everything in a very specific way. If it’s cold she has different methods for keeping the glue and other materials warm. Everything is placed just so, because once the process starts, you are going for a ride …
She showed us the trim she uses for shoe placement; it’s sort of a hybrid barefoot/farrier trim, with the wall prepared flatter, much as you’d see when a farrier preps a foot for a shoe. She also worked hard to clean up places where bacteria might grow, or which might create an uneven or difficult area for the glue to adhere to the sole or wall surface, whether it was in the white line area, the frog or the sole.
From there she introduced us to the moisture meter and theorized that what caused my boot failures was very likely moisture in the foot, which is not only picked up from wet ground and grass, but also humidity in the air.
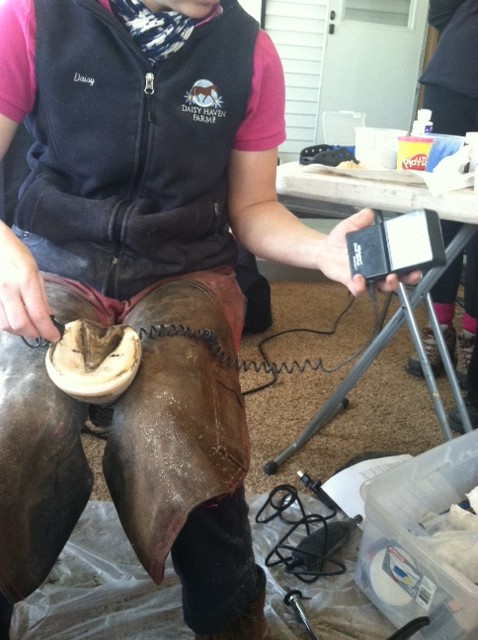
Using the moisture gauge — this cadaver foot is wet!
[I had a vision of myself in Gene’s barn in VT, gluing on boots for the first time unsupervised with Mary Coleman’s help. Roughly 90 degrees and 95% humidity, with a thunderstorm bearing down, it didn’t much matter that Ace had spent the previous 24 hours in a dry bedded stall, the air was absolutely saturated with water. No wonder I had total boot failure!]
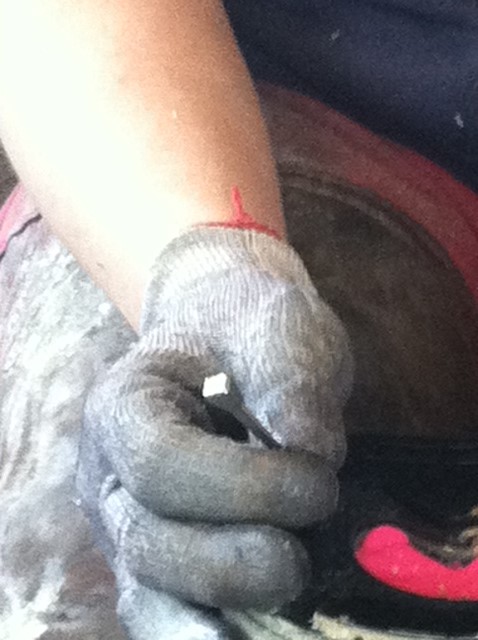
The cadaver foot showed a super moist surface, having been removed freshly from the garage after thawing out, so Daisy used a small butane torch [anyone want to buy my heat gun?] to dry the foot. Not only is it quieter (something Ace’s Saddlebred half will approve) but it is hotter and works faster than the heat gun. Pass it over your skin to test the heat level, and obviously you need to avoid the coronary band, hair, flammable liquids, cardboard, etc. Safety first!
Moisture testing after just a few passes with the torch showed us in the dry (green) region — good to go!
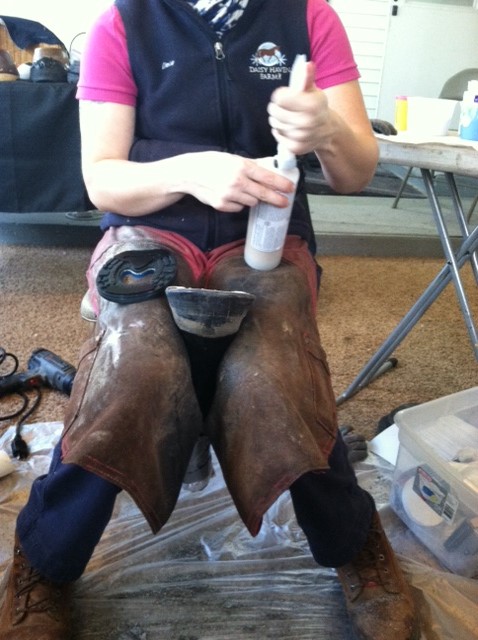
Next, we learned about Artimud, a product from the UK, which is antibacterial and antifungal and a product that Daisy presses into the collateral grooves, all over the frog and into the sulcus, wherever one might be concerned about thrush, but not where the glue touches the surface of the foot. Obviously, gluing a product like this on in our neck of the woods where thrush is a real challenge, needs some attention to this potential. Daisy has indicated significant success with Artimud.
Actimud — good stuff! Added to shopping list. Check.
She also treated the white line of the hoof with Fungidye and wiped and dried the area with the torch after it was applied to re-dry the surface.
Now it was time to work with glue!
I was thrilled to learn we have an option other than Vet Tec Adhere (urethane glue), a product I’ve struggled with, because the gun requires bionic hand strength (something I do not possess), leaving me to watch my husband apply glue and critique his every move. “Oh too much!” or “Hurry up, it sets up fast!” or “Oooh, you missed a spot!” It also sets up so fast, especially in the heat, that one is somewhat forced to sacrifice technique for speed, at least when one is an amateur and a bit of a klutz like me.
(If you don’t feel like a klutz, try gluing on any equine footwear. The pros — i.e. Garrett and Kevin and Daisy –make it look so simple and easy, but I defy you to come through your first experience without wondering if were a part of some Saturday Night live skit! You set everything up just so, laid out neatly, and then time starts to speed up once the glue is flowing, the horse (for the first time) refuses to pick up its foot, sweat drips off your nose, you find yourself muttering ‘where’s my mallet? where’s my mallet?’ when in fact your mallet is sitting within 1/4 inch of your left foot. It is not a chore for the easily flustered.)
When Daisy explained that the Equilox or Polyflex Bond (which are acrylate versus urethane glues) set up slowly enough to be “buttered” or shaped after the shoe was applied, my heart sang and I exclaimed to the entire group —
“This glue may save my marriage!”
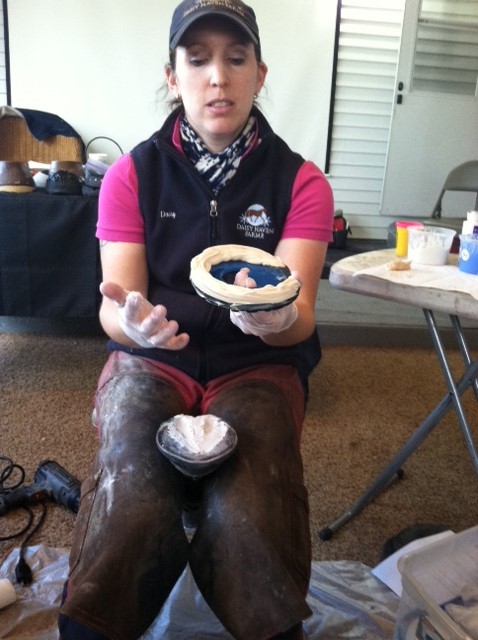
Daisy showed us how to apply the tip (which is far simpler than the Vet Tec tips) and how, as with Adhere, one must dispense enough glue to ensure the two components are correctly mixed. Incorrectly mixed glue components = glue failure. When it’s properly composed, Equilox is a light cream color. Some of the batches required quite a bit of product released before the proper mix was established.
“This glue may save my marriage!”
Daisy generously applied the Equilox to the Epona shoe, and I mean, she slathered that stuff on! She recommended pumping faster than you move the tip so that you dispense enough to work with quickly.
Equilox on Epona — ready to go!
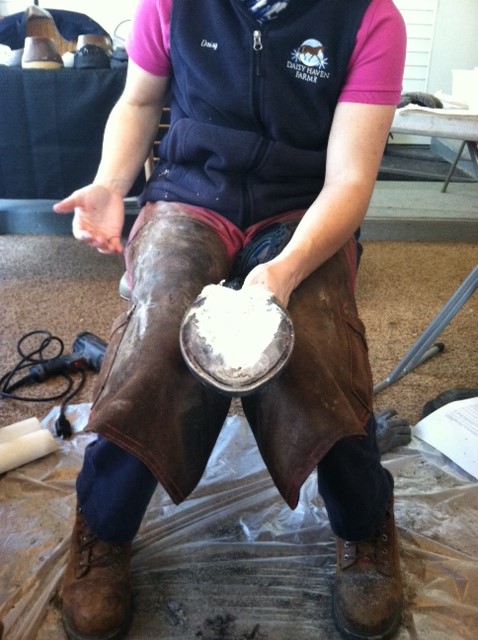
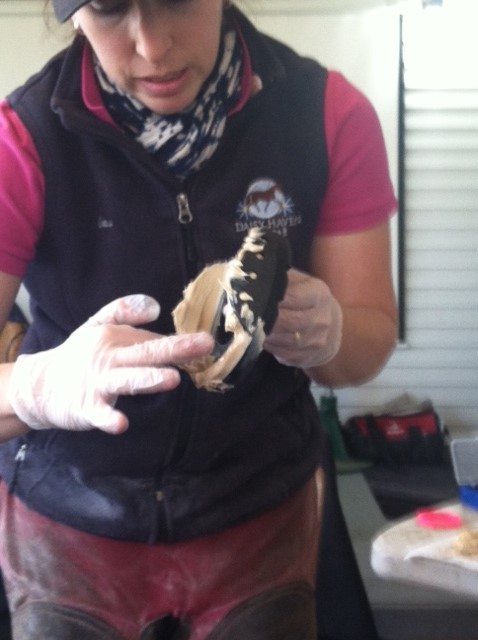
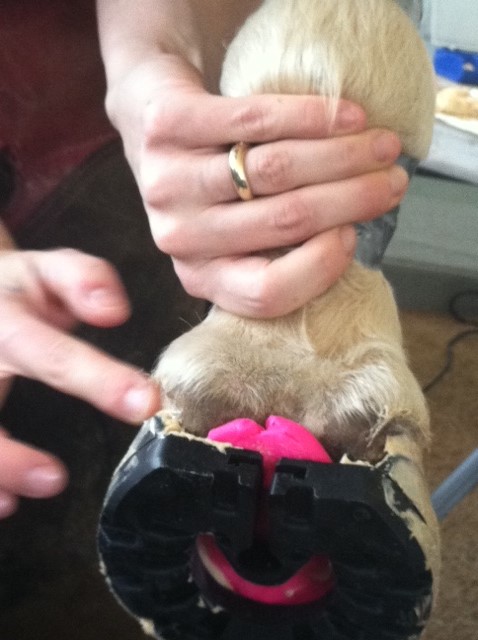
Once the Epona shoe was buttered, she set it aside, and quickly applied dental impression which had been pre-mixed and set aside to the sole surface [warning! don’t overhandle your dental impression — it cures as it warms!]. She applied it all over the Artimud and over the rear of the foot. The dental impression (in our case, we used pink PlayDoh, which is far cheaper than dental impression) acts as both a barrier beneath the shoe and provides cushioning, much like the Sikaflex we used in our glue-on boot application. [Do not use PlayDoh instead of dental impression; we used it for demo purposes because it has a similar consistency and is much cheaper than dental impression!]
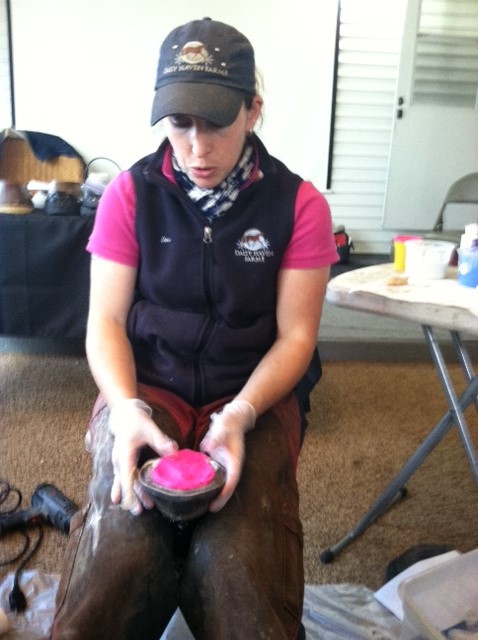
Pressing on pseudo-dental impression (aka pink PlayDoh) before the shoe gets placed
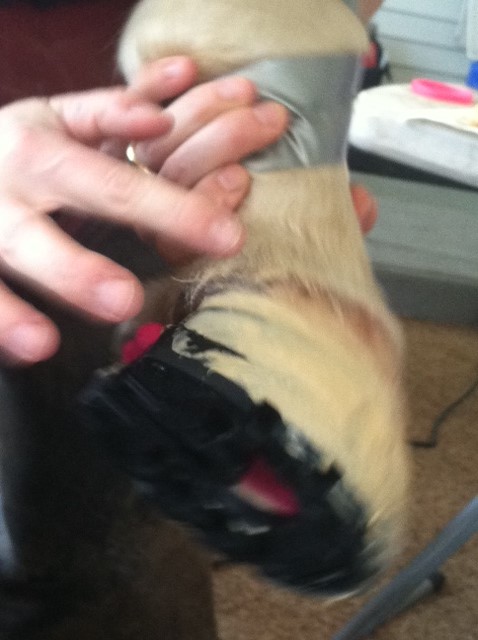
Then she popped the foot back between her knees and placed the shoe. She set it back a bit from the toe, at the edge of the white line, where she wanted the breakover to be, noting she could clean up the trim when everything was cured. Once the shoe was placed, she set to work with a flat finger, “feathering” and smoothing the excess Equilox up over the edge of the hoof wall, providing a smooth bond all the way around the foot, right to the heels. (Be careful not to gouge or dig into the foot/glue/shoe interface!)
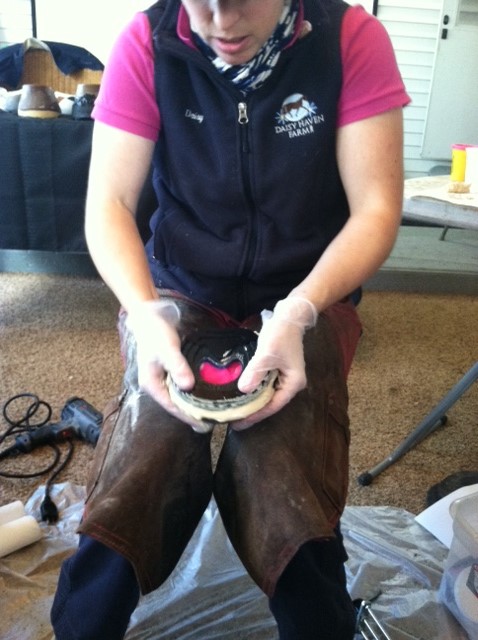
Epona pressed in place
It was fairly chilly in the room where we were working, which caused the Equilox to cure more slowly, but I was still impressed with the amount of time she had to work with the glue to perfect the fit and seal. She let us feel the heat, and how the texture became gummy and then just plain solid. Unlike the Adhere applications, you need to hold the foot up until the Equilox sets.
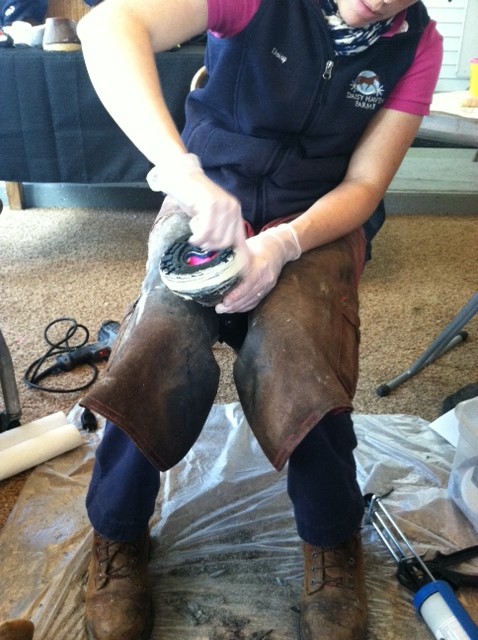
Flat finger! No gouging the glue!
Daisy indicates it is a “rite of passage” to glue a shoe to your leg as you remove the horse’s leg from where it is placed to apply the shoe. (I’m planning to skip this but promise to get a photo when I do achieve it, or better yet, when Richard achieves it. It can be his new Facebook profile photo! I digress.)
Epona ON!
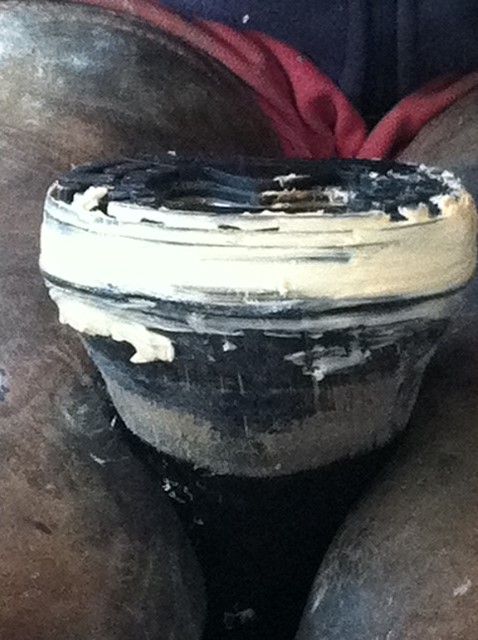
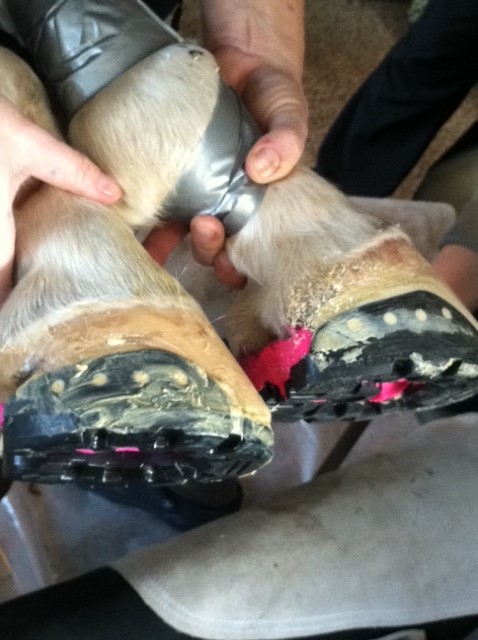
Once the shoe was set, it was clean up time. Rasp off excess glue. She also showed us how to clean up the nail holes and place a few nails to further secure the shoe, if you wished. She nailed at holes 2 and 4 with Emmick’s 60 nails.
Cleaning out the nail holes with, you guessed it, a nail

Nicely glued Epona with nails (but the horse is still dead)
As a reminder, the process works like this: Hoof prep, glue shoe, finish and then on to the next hoof. This allows the hoof prep to hold, the foot to stay clean and dry, and for you to remember imperfections in the hoof that might cause you to use a little more glue, as well as precisely how you want to place the shoe. One at a time.
Everyone wanted to see the new EasyShoe next, so Daisy moved on to that demonstration.
The primary differences with the EasyShoe process is that there are different models to use depending on whether you plan to glue, nail, or glue/nail and that the hoof prep suggested by the EasyCare folks is somewhat more rigorous than what she practices with the Epona shoe.
http://blog.easycareinc.com/blog/hoof-boot-news/launching-the-new-easyshoe
So, mostly the same. Trim, and then clean up, but this clean up involves a dremel.

Our friend the dremel tool
Dremeling out imperfections, small pockets that could harbor bacteria, anything that might be a trap for future trouble while the shoe is in place, including the white line area. Then a general wirebrushing, then a going over the entire gluing surface (don’t forget the wings!) with a big wheel on the tool. Of course there are other tools we could buy for this (Makita!) but I have a dremel and that’s where I’ll be starting!
Then moisture gauging and the torch, Artimud but no Fungidye if you are going to glue on with Adhere! (Apparently they do not get along.)
Buttering with Equilox and the EasyShoe looks a lot like what we did with the Epona.
Get plenty of glue on those wings
When the EasyShoe is placed it needs to go side to side, that is, wing to wing over the foot. Apply toe to heel is not a good option. Feathering the glue over the wings is critical! In this case, more is more — do not be stingy with the glue.
Feathering the excess glue over the wings is key to preventing moisture from getting in and preventing shoe failure
A bit more dental impression to seal up the dental impression/shoe gap over the frog. Rasp off excess glue — and good to go!
Then we got to practice. Everyone wanted to work with EasyShoes and Equilox so we prepped our cadavers and set to work.
I opted to let Richard do the work while I played coach/critic. (How many of you are now predicting Rich’s nomination for sainthood?)
Okay, so our trimming tools suck. We’ll be shopping for something better, even if just for doing clean up here and there. Shopping list. Check.
Rich is a natural at gluing. He used just enough glue, placed the shoe well, and didn’t glue ANYTHING to his leg! It turns out that while it is handy to have an assistant (mostly to keep track of your stuff and ensure everything is ready to go), the gluing and application really is a one-person job.

Rich’s handiwork
We compared and contrasted Rich’s gluing job with another, which could have used a little more glue to secure the wings and seal them against moisture. Still, they both had less glue than Daisy’s which was our ideal prototype, so lesson learned.
Not enough glue (left) versus just barely enough glue (right)
Another case of not enough glue. Sense a theme here?
All in all it was an absolutely fabulous day, and I not only have an extensive shopping list, a whole arsenal of notes and an understanding that I did not have before, but I also have a little glimmer of hope that everything that got us there would take us to a place we want to go!
Can’t wait to give it a try. Let me know what you think.
For those on the east side of the Mississippi, looking for opportunities to learn to trim and glue on products, check out daisyhavenfarm.com
Happy trails!